Prakai's Wiki, eduroam-TH SP Monitoring
From Prakai Nadee
eduroam-TH SP Monitoring firmware installation for M5StickC
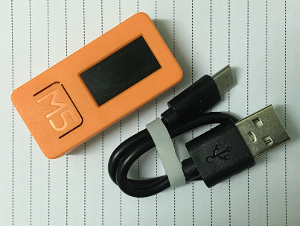
M5StickC ESP32-PICO Mini IoT Development Kit
- ESP32-based (ESP32-PICO)
- USB Type-C
- 4 MByte Flash + 520K RAM
- 2 Buttons, LCD(0.96 inch), 1 Reset
- 2.4G Antenna: Proant 440
- 5V DC power supply
- 80 mAh Lipo Battery
- Development Platform UIFlow, MicroPython, Arduino
Where to buy
- ฿396, M5Stickc Esp32 Pico Mini Iot Development Board Finger Computer With A Color Lcd Display
- ฿399, M5Stack M5StickC ESP32 PICO Color LCD มินิ IoT บอร์ดโมดูล สำหรับ Arduino
How to flash eduroam-TH SP Monitoring firmware for M5Stick_C
System requirement
- Desktop/Labtop computer
- Microsoft Windows 8, 10
- Windows PowerShell
- USB port
Instruction
- Download eduroam-TH firmware and flashing tool
- Extract the downloaded file to a local disk (ex: D:\):
- List of files:
D:\eduroam-TH-firmware\
 - esptool.exe
 - M5StickC.ps1
 - ESP32-eduroam-mon.ino.m5stick_c.bin
 - ESP32-eduroam-mon.ino.partitions.bin
 - boot_app0.bin
 - bootloader_dio_80m.bin
- Run Windows PowerShell: Win+r >> PowerShell.exe
Windows PowerShell
Copyright (C) Microsoft Corporation. All rights reserved.

PS C:\Users\Hello World> _
- Change location to D:\duroam-TH-firmware
PS C:\Users\Hello World> D:
PS D:\> cd eduroam-TH-firmware
PS D:\eduroam-TH-firmware> _
- Enable execution of PowerShell scripts
PS D:\eduroam-TH-firmware> Set-ExecutionPolicy -Scope CurrentUser -ExecutionPolicy Unrestricted -Force
- Run the flashing script: M5StickC.ps1 and follow the instruction
PS D:\eduroam-TH-firmware> .\M5StickC.ps1
=======================================================================
=============== eduroam-TH monitoring device flash tool ===============
=======================================================================

1) Connect M5StickC to computer

Press Enter to continue...:
- Connect M5StickC to USB of computer
=======================================================================
=============== eduroam-TH monitoring device flash tool ===============
=======================================================================

2) Select a COM port

1: USB Serial Port (COM101)
2: Standard Serial over Bluetooth link (COM5)
3: Standard Serial over Bluetooth link (COM6)
4: Standard Serial over Bluetooth link (COM3)
5: Standard Serial over Bluetooth link (COM4)
Q: Press 'Q' to quit.

Please select COM port: 1
- Firmware flashing starts
=======================================================================
=============== eduroam-TH monitoring device flash tool ===============
=======================================================================

Flashing: USB Serial Port (COM101)
=======================================================================
esptool.py v2.6
Serial port COM101
Connecting....
Chip is ESP32-PICO-D4 (revision 1)
Features: WiFi, BT, Dual Core, 240MHz, Embedded Flash, VRef calibration in efuse, Coding Scheme None
MAC: d8:a0:1d:52:24:14
Uploading stub...
Running stub...
...
Leaving...
Hard resetting via RTS pin...
- Device reboot and running
=======================================================================
3) Disconnect M5StickC from computer to stop serial monitor
=======================================================================
M5StickC initializing...OK

eduroam-TH SP monitoring device version 0.30-2019103100
ESP32 Development Board: M5Stick_C
...
Connecting WiFi to: eduroam
Security Type: WPA2 Enterprise
.............................
WiFi connection successfully
...
Wifi will disconnect and reconnect again in 30 minutes
Going into DeepSleep mode and will wake up in 30 minutes
- Disconnect M5Stick_C from computer
How to use
Power on, Connect successful, DeepSleep and Wakeup
Power on, Connect fail
Power on, Reset configuration
